

In a past post on the Clinical Mastery Series blog, clinical faculty and educator Dr. Chris Catalano introduced a tooth width proportion formula he uses to enhance smile design in everyday dentistry. Here, he’ll go into more depth on the case where he used the formula to great success.
 This blog is essentially a continuation of the case study I introduced in my first Tooth Proportion blog. I referenced the beginning of the case and mentioned how to use the tooth proportion formula to ensure a beautiful smile. Now, I will actually explain what I did in the case and how to do it yourself. Keep your eye out for a subsequent blog where I’ll show the final result!
Ectodermal Dysplasia, Orthodontia, and a Tooth Width Proportion Formula
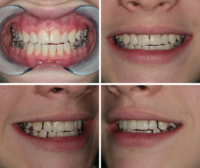
 I recently encountered a case involving a 14-year-old boy with Ectodermal Dysplasia. The dysplasia left him with numerous undersized conical shaped front teeth. He was already going through orthodontic treatment and his orthodontist Dr. Golnaz Ashraf requested my help in figuring out his restorative end goal.
 In the first blog on my favorite tooth width proportion formula, I showed a picture of the case and a brief discussion of how I would address it. Now, I want to go into more detail about it because of how valuable the tooth width proportion formula is for determining ideal tooth widths.
 The dysplasia case is extreme, but the concepts I introduce can be applied to many other cases and situations that you might encounter on a daily basis.
Case Goals and Initial Considerations
The ultimate goal was to give the young boy a new smile that he loves. Pre-treatment, he was self-conscious about his smile. He’s at the age when there are significant physical, mental, emotional, and social changes. Teenagers start to show more concern about their body image and the smile is an important part of their overall confidence. Dentally my goal was to create correct tooth form, idealize tooth widths, and enhance function.
This was a transitional case because he is 14 years old and beginning orthodontic treatment. His teeth are not in the final position and he has not finished growing.
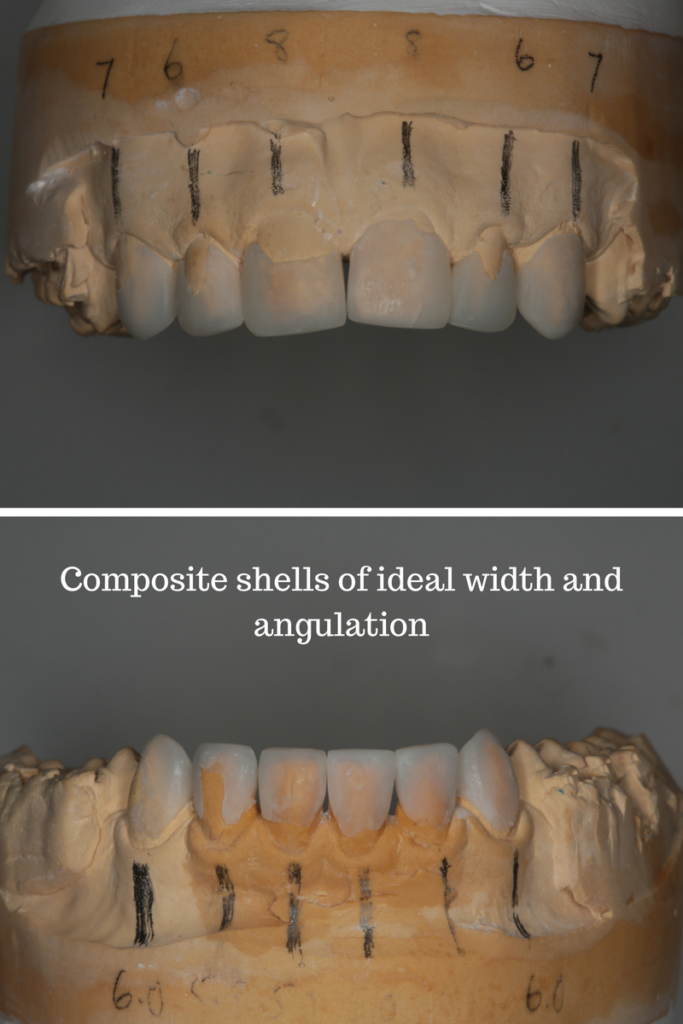
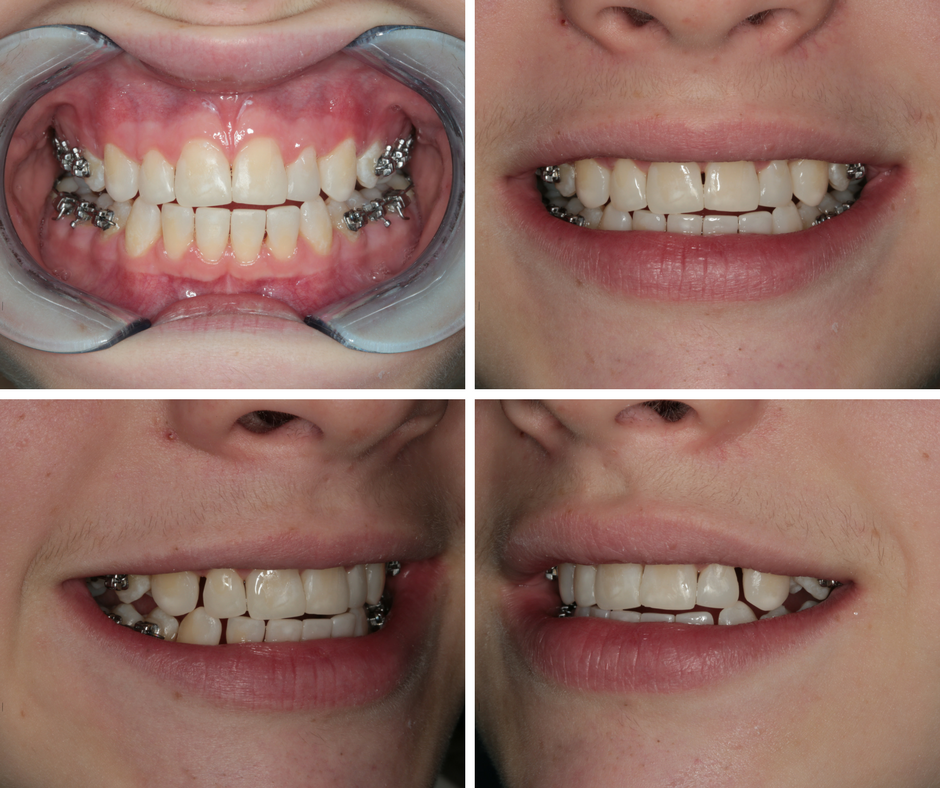 The restorative material of choice was composite resin. The initial restorations done in composite could be easily added to or adjusted during orthodontic treatment.
Creating a Successful Outcome and Collaborating With the Lab
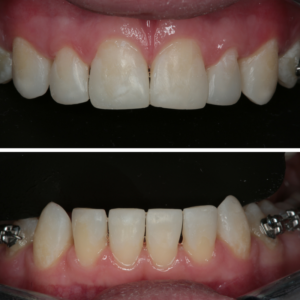
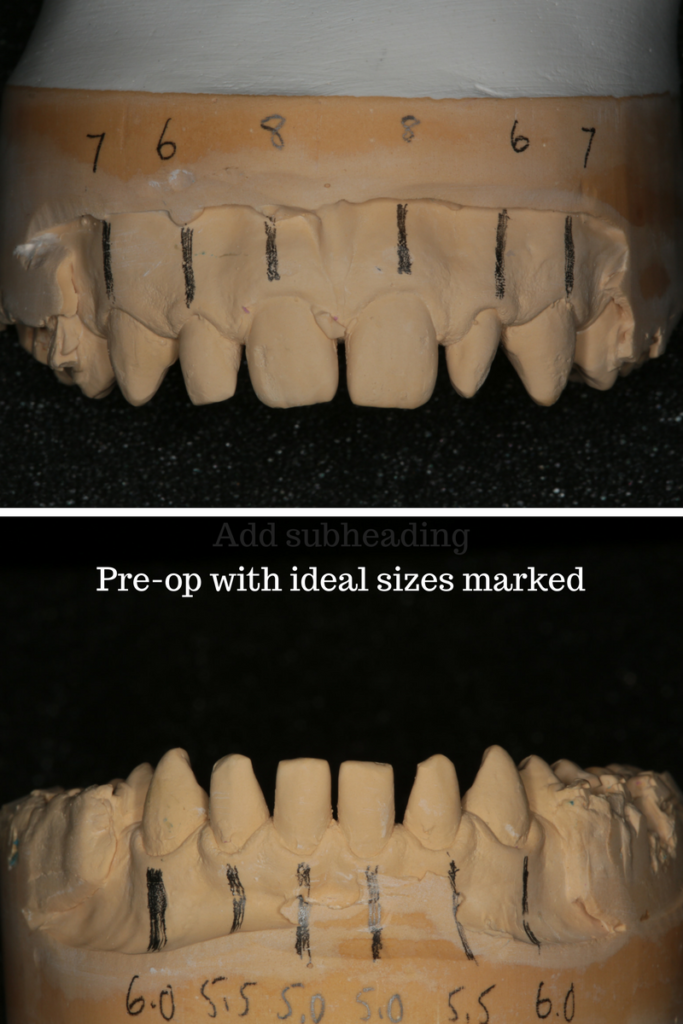
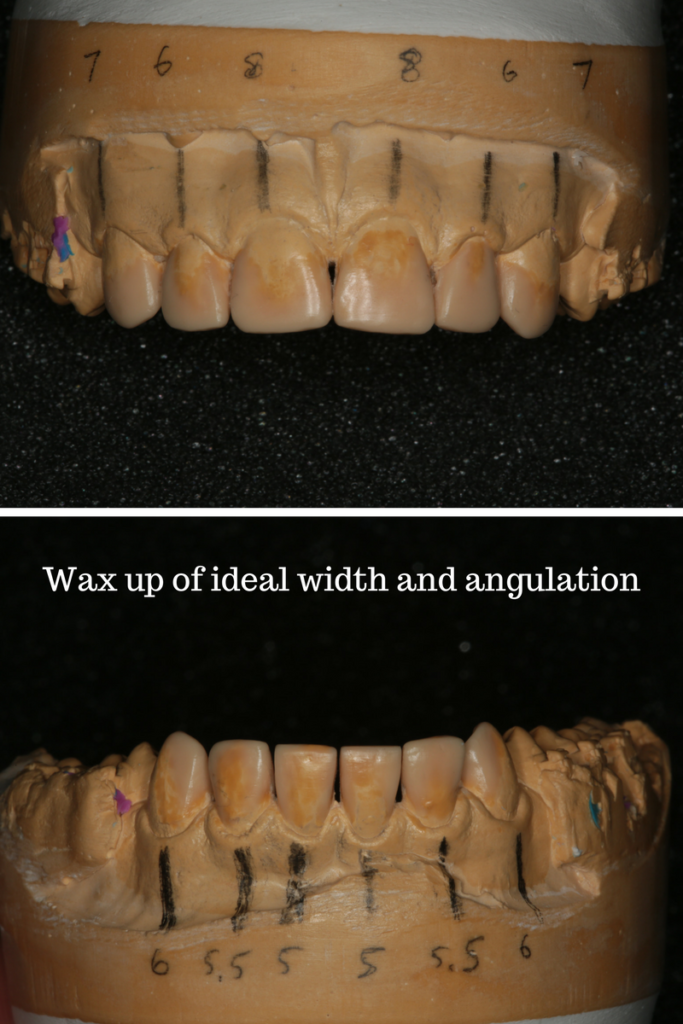
To create a successful outcome for this case, specific width instructions and true anatomic position of these teeth needed to be communicated to the lab. Using the tooth width proportion formula I outlined in the first blog, I was able to give the lab the correct widths of each tooth needed for a diagnostic wax up.
As far as finding the true anatomic position of the teeth involved, the use of X-rays were needed to determine the root angulation of the teeth. I conveyed this to the lab on the model with simple lines drawn on the cast meant to simulate the root position.
To be continued…
How would you approach treating this case? Let us know your thoughts in the comments!