


Veneer Month is in full swing here on the Gold Dust blog. Read on for Dr. Brady’s second installment of veneer-oriented advice and clinical tips.
A large majority of the anterior restorations I complete incorporate changes to tooth position, alignment or contour. I aim to balance the required tooth reduction to accomplish the clinical goals with being conservative.
Often the changes we are making between the existing tooth position and the proposed tooth position are additive and act to reduce the amount of reduction required. Tooth reduction is challenging enough to get accurate without the added guessing of what will be needed to accomplish the tooth form from a wax-up.
Transferring the information from the diagnostic wax-up to the teeth in the form of a mock-up allows me to use my usual technique, cut depth cuts and create the required reduction from the final tooth position, conserving tooth structure.
Tooth Reduction and Conservative Goals
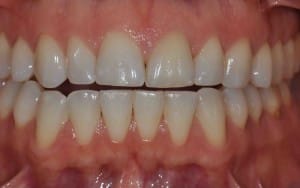
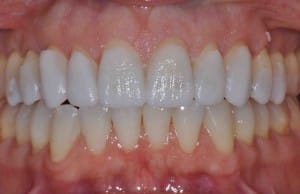
Pre-Op
I begin by utilizing a stone model of the wax-up to create a silicone matrix. I suggest having your lab duplicate the wax-up and send you a stone model. if you do decide to do it yourself carefully take an alginate impression of the wax-up and pour in stone.
You can utilize either a silicone or copyplast matrix to create the mock-up. I spot etch the labial surfaces of the teeth. I fill my matrix with bisacryl provisional material, intentionally going two shades lighter or darker than the existing tooth color. The shade discrepancy allows me to clearly differentiate between the natural tooth and an y remaining bisacryl. I allow the material to come to a full cure, and than remove the matrix.
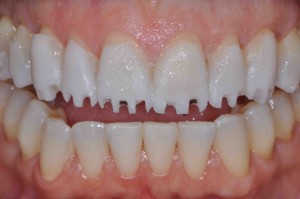
Incisal Depth Cuts into Mock-Up
Evaluate the mock-up at the gingival. You should be able to easily separate the material that went over the tissue, almost as if it is perforated at the gingival margin. If the bisacryl is think at the gingival margin it means the matrix flared at the gingival, is distorted and not an accurate representation of the wax-up.
In these cases I pop the mock-up off and repeat the process being careful not to over seat the matrix, or create heavy pressure in the anterior.With the mock-up complete begin your depth cuts and preparation. You may even have to remove some remaining bisacryl as the prep does not have to go to the natural tooth.